Difference between revisions of "IODD-2541"
m (→FAQ) |
m |
||
| Line 164: | Line 164: | ||
# FAT version - supports Fat32 and exFAT partition. | # FAT version - supports Fat32 and exFAT partition. | ||
# NTFS version - supports NTFS partition. | # NTFS version - supports NTFS partition. | ||
| − | # There are | + | # There are 2 types of encryption version. one is '''6x''' . the other is '''7x'''. |
#* '''7x''' is more secure than '''6x''' against brute force hacking. | #* '''7x''' is more secure than '''6x''' against brute force hacking. | ||
#* '''6x''' and '''7x''' are not compatible to each other. | #* '''6x''' and '''7x''' are not compatible to each other. | ||
Revision as of 22:36, 18 June 2016
Contents
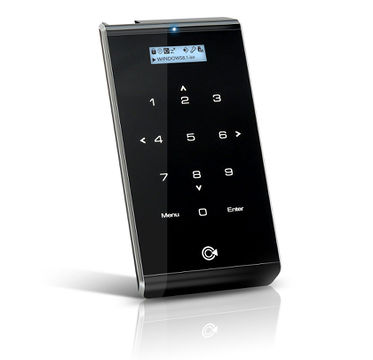
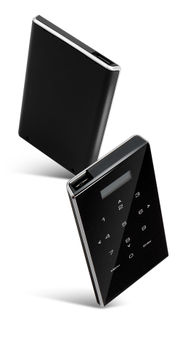
- 1 Appearance
- 2 Functions
- 3 Specifications
- 4 How to use
- 5 Manual
- 6 Messages
- 7 FAQ
- 8 Firmware
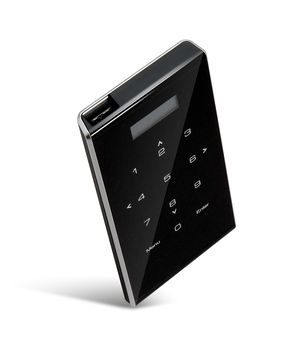
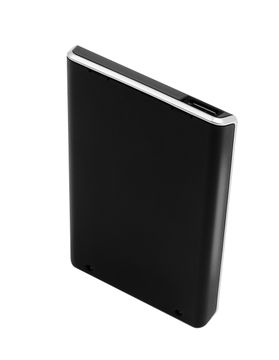
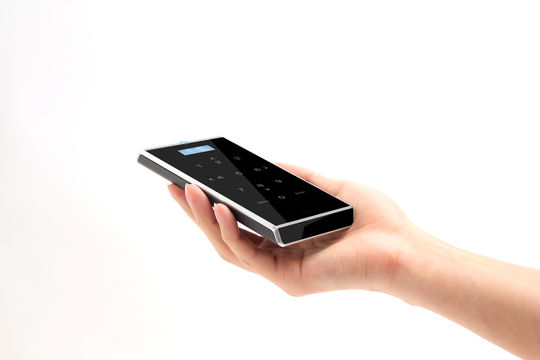
Appearance
Functions
- Bootable Virtual CD-ROM, DVD-ROM, Blu-ray Drive
- There is no need to buy DVD-ROM and blank media for OS installation.
- ISO (CD, DVD, Blu-ray) is supported.
- Bootable Virtual USB Drive and Flash Drive.
- iODD supports OS installation and Multi Booting. (and "Windows-To-Go")
- Virtual Disk Drive - can do all functions as USB Flash Drive can do
- VHD and VMDK (Virtual Disk Drive), RMD (Virtual Flash Drive), IMA (Virtual Floppy Disk Drive) are supported.
- Multi LUN
- max 1 optical drive, 1 hard drive, 4 virtual drives are supported at the same time.
- hotkey for safely removal.
- The last physical safeguard. this key provides the safe removal.
- Write Protection
- The last logical safeguard. I keep my drive. Good bye Virus.
- Optional Write Blocker. (Hard wired)
- Real-time AES 256-bit XTS Military Grade Encryption ( iODD-2541 )
- 4-15 Pin digits. 6 digits is enough for protecting your data. (against the developer of iODD-2541)
- All functions work well with Encryption
- Encryption is optional. you can use without encryption.
- Maintain Loading State
- Save and maintain the loading state and menu for next boot.
Menu
- Mode Select - Define USB devices mode
- Dual Mode - 1 Disk Drive and 1 Optical Disk Drive
- HDD Mode - 1 Disk Drive.
- ODD Mode - 1 Optical Disk Drive.
- USB Control - USB Control
- Write Protect - Write-Protection for the Drive.
- If virtual drive is mounted, this option applies to the virtual drive. (not to real disk drive)
- Refresh - Reconnect the iODD
- Safe Removal - stops the spindle motor and goes to power saving mode
- Umount VHDD - Unmounts All the Virtual Disk Drives
- Write Protect - Write-Protection for the Drive.
- Information - Information
- S.M.A.R.T. - informs the following status of the internal Disk Drive
- HDD Health - Disk Drive Health
- HDD Temp - Disk Drive Temperature
- HDD Model - Disk Drive Model
- HDD Serial - Disk Drive Serial
- Product Info - Product Info
- Firmware Ver - iODD's Firmeare Version
- USB Speed - Currently connected USB Speed
- USB Lowest Volt - USB BUS voltage. (lowest voltage)
- Current Voltage - USB BUS voltage. (current voltage)
- S.M.A.R.T. - informs the following status of the internal Disk Drive
- Setting - Settings
- LCD Bright - adjusts LCD back-light brightness
- Idle Bright - adjusts LCD back-light brightness in power saving mode
- Standby time - adjusts the inactive time before power saving mode is active
- Load Default - restores all settings to their default values
- Encryption - Encryption
- Warning - The Following action will destroy HDD data permanently
- But, Remove Encryption right after Set Encryption does not destroy HDD data
- Set Encryption - Set Encryption (,Input 4 - 15 digits PIN)
- Remove Encryption - removes Encryption
Specifications
- External Interface - USB 1.1 / 2.0 / 3.0 (MAX 5G bps)
- Internal Interface - SATA I / II / III (Backward Compatible)
- 2.5 Inch HDD, SSD (9.5mm width) can be installed. 4TB+
- 7mm disk drive may requires a spacer.
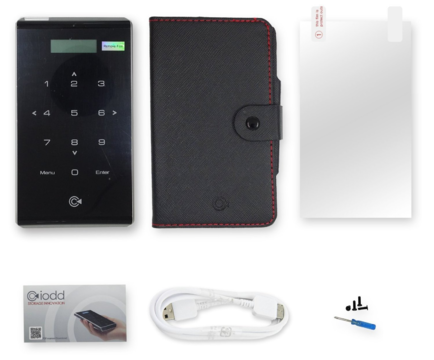
- 12 touch keys, USB 3.0 micro B-Type connector.
- touch problem is cleared. #FAQ
- LCD - 128 * 32 dots.
- Material - Aluminum, PC (Plastic).
How to use
- At first please refer to the below Manual.
Basic function
iODD's Sample Folder Tree
- create a folder named "_ISO" at root folder.
- This folder tree is an example.
- Any file name and folder name under "_ISO" is acceptable
J:├─_ISO│ │ Hiren’s BootCD 15.2.iso │ │ ubuntu-14.04.4-desktop-amd64.iso │ │ Windows 10.iso │ │ Windows XP sp3.iso │ │ (max 32 files or subfolders in a folder) │ │ │ ├─IMA for Floppy│ │ Bios updater.ima │ │ MS-DOS 6.0.ima │ │ Symantec Ghost.ima │ │ │ ├─RMD for Setup│ │ Win 7Ent_x86_x64+8.1Pro+10Pro vol2.RMD │ │ Win7_Ult_SP1_Russian_x64.RMD │ │ Windows 10.RMD │ │ │ └─VHD for Booting│ │ linuxmint-17.3-cinnamon-32bit.vhd │ │ Windows 10 Win2Go.vhd │ │ Windows 7 OS Booting.vhd │ │ │ └─Nested Subfolders is allowed├─Your Folder 01├─Your Folder 02├─Your Folder 99│ Your files 01.txt │ Your files 02.txt │ Your files 99.txt
2531 Keys
- Browsing
-
Jog DialUp/Down. - list Up/Down. -
Jog Dialpush. - Select a file. -
BackUppush. - Go to parent folder.
-
- Menu
-
Jog Dialpush for 3 seconds. - To enter to Menu mode. -
BackUppush. - To exit.
-
- Long key ( push for 3 seconds )
-
Jog Diallift up. - refresh the file lists -
Jog Dialget down. - Go to Power Saving State -
Jog Dialpush. - enter to Menu mode -
BackUppush. - Reboot. and detach all virtual drives (VHD, RMD, IMA)
-
- Startup Keys (during startup)
-
Jog-Diallift up. - Start up with CD-MODE -
Jog-Dialget down. - Start up with HDD-MODE -
Jog Dialpush. - reset the loading state. Start up with DUAL-MODE -
BackUppush. - Start up with Write-Protected mode.
-
2541 Keys
- Browsing
- Up/Down list -
2/8 - Select a file -
5(or6, for maintaining loading state)
- Up/Down list -
- Menu
-
Menu- to enter to Menu. (or Exit). -
4- Go to upper list
-
- Long key ( push for 3 seconds )
-
1- Go to Power Saving State -
3- reboots iODD -
4- refreshes file lists -
7- Reboot. and detach all virtual drives (VHD, RMD, IMA) -
0- Reboot. and temporarily disable Write-Protection
-
- There is not Startup key
Go to Power Saving State
- Power Saving State : Spindle motor is stopped and LCD brightness is low.
- CD loading state is saved.
-
Jog Dial. down for 3 seconds. (2531). -
1. push for 3 seconds. (2541).
Selecting a file
- In order to maintain loading state, you must save the state.
- refer to the above key operations.
- (2531) #2531 Keys
- If Firmware version is 1558 or higher, loading state is automatically saved.
- If not, you must save it manually. (Go to Power Saving State)
- (2541) #2541 Keys
- If Firmware version is lower than 6(7)9-05, button
6has no function.
- If Firmware version is lower than 6(7)9-05, button
Safely Removal In OS
- If iODD's partition is NTFS, then this function is mandatory when disconnecting iODD from host.
- NTFS does not write Immediately the data to HDD.
- Please do Safely Removal before disconnection.
- If iODD is in write-protected mode and an error message appears, then disable write-protect option. and retry this function.
Initialization
- the firmware is two sorts. (NTFS type, FAT32/exFAT type)
- NTFS firmware version is shipped.
- If you use FAT32 or exFAT Partition, then run FAT Firmware Updater. (FAT32 exFAT Partition)
- follow the next steps
- assemble the HDD or SSD with iODD
- connect the iODD to PC
- initialize the drive to MBR. (wken:MBR)
- Format the first partition as NTFS. (if the firmware is FAT, then format it as FAT32 or exFAT)
- In FAT32 partition there is 4G byte file size limitation. please use that carefully.
- create "_ISO" folder in root folder. (not case sensitive)
- copy ISO file to "_ISO" folder. (or create VHD RMD IMA files)
- safely remove iODD. ( very Important if NTFS). (safely remove).
- If Power Saving mode is active, then disconnect and reconnect the USB cable.
- If not, then Go to Power Saving State
- If "Plug Out ..." (or "Plug Out ...") message appears, reconnect the USB cable.
- The following messages will appear sequentially in LCD
- "iodd 253(4)1"
- a file name
Initialize All
- If Initialization fails, follow the next steps
- disconnect the USB cable.
- remove the HDD from iODD. and Connect directly it to PC.
- Initialize it to GPT. (msen:GPT)
- redo Initialization (from the first step). (your HDD is initialized as MBR -> GPT -> MBR).
- Open back cover
- Press tact switch
- Connect USB cable
- Wait 7 seconds
- Release tact switch
- Wait 1 minutes
- All done
First Aid
- If it has failure suddenly, try one of the following steps until the error is clear
- (2531). press the Jog Dial and hold. and then connect iODD to PC. (#2531 Keys. refer to Startup Keys)
- try Safely Removal In OS.
- Check Disk for iODD ( for Windows)
- Rename "_ISO" folder name to other name. create new folder named "_ISO". and copy files to this folder. (not moving)
- Update it with the latest firmware.
- Backup the data of iODD, and Initialize All
- If there is hardware problem
- Reboot the PC
- Please change USB cable
- Connect iODD to the port of PC back panel.
- Try it on another pc
- Please change the HDD.
Using a Virtual USB Optical Drive (DVD-ROM or Blu-ray ROM)
- copy ISO files to "_ISO" folder. (or to subfolder)
- Safely Remove. (Required for NTFS )
- If Power Saving mode is not active , then Go to Power Saving State
- If "Plug Out ..." (or "Plug Out ...") message appears, disconnect the iODD.
- Connect iODD to a PC. and power on the PC.
- (Optional) select iODD or USB CD-ROM as the first priority of BOOT order in BIOS.
- If a file has not been selected, then select an ISO file. Selecting a file
- If PC doesn't find boot device, then reboot the PC. (Ctrl-Alt-Del)
Booting Error
- Confirm whether the ISO file is bootable.
- If your PC does not support multi LUN, please select CD-MODE (or ODD-MODE).
- In order to confirm whether the ISO file is able to boot, please try to test it with the validated PC.
- Although it is bootable ISO file, please confirm whether the result with a real USB DVD-ROM is the same
- If the ISO file can be boot with USB DVD-ROM, then use USB Y-CABLE for adding external power.
- If your laptop has own internal DVD-ROM, please disable internal DVD-ROM at BIOS settings. or remove it.
- The older OS than motherboard may not have an appropriate driver to boot.
- ex) It is impossible to install a genuine Windows 7 on Skylake platform using USB DVD-ROM device.
Using a Virtual USB fixed disk drive (Virtual Hard Disk)
- Fixed-size VHD file only is supported. (dynamic VHD and VHDx files are not supported)
- Also fixed VMDK file is supported.
- Create VHD files directly to iODD by "VHD Tool++". ("VHD Tool++" can creates a file without fragment)
- You can create VMDK by changing file extension. (VHD -> VMDK).
- If you select a VHD file, then iODD will be rebooted with CD-MODE. and it will be recognized as a USB disk drive.(Selecting a file).
- If you want to change to DUAL-MODE or to change Write Protection option, rename the VHD filename. refer to "VHD Tool++"
- Max 4 Virtual Drives are supported at the same time ( Successive selection within 3 seconds)
- create a VHD file using a tool. (VHD Tool++).
- If successful, safely remove iODD from OS. (#Safely Removal In OS. Very Important to NTFS.)
- If Power Saving mode is not active, then Go to Power Saving State
- If "Plug Out ..." (or "Plug Out ...") message appear, disconnect the iODD.
- Connect iODD to a PC. and power on the PC.
- (Optional) select iODD or USB Device as the first priority of BOOT order in BIOS.
- If a file has not been selected, then select a VHD file. (Selecting a file)
- If PC doesn't find boot device, then reboot the PC. (Ctrl-Alt-Del)
Using a Virtual USB Removable Flash Drive (Virtual USB Flash Drive)
- Almost the same as the above method. (Using a Virtual USB fixed disk drive)
- But the file extension must be changed. "VHD" -> "RMD"
Using a Virtual USB Floppy Drive (Virtual FDD)
- This method is not supported on some computers.
- Uncompressed floppy image IMA, IMG, BIF, VFD are supported.
- IMG, BIF, VFD image file extension must be renamed to IMA.
- Almost the same as the above method.
Manual
Messages
- If LCD message shows like the followings
Status Messages
- "Please Wait" - please wait
- "Plug Out ..." - please disconnect
- "Data Saving..." - please wait for saving data
- "Flash Update..." - please wait for updating flash
- "Input Limit..." - Max PIN Input Error. please reconnect
- "Replug USB..." - please reconnect
- "Not Match..." - PIN is not matched
- "NO DEVICE !!!" - HDD is not detected
- "HDD ERROR !!!" - HDD Read Error
- "HDD WARNING ???" - HDD Bad Sector Warning.
Error Messages
"Check HDD" - Check HDD
- Do First Aid
"1st partition" or "unsupported partition" - Partition Mismatch with Firmware
- This error occurs if the firmware type does not match the first partition of iODD.
- Please Check the above Initialization.
"bad or N/S HDD" - bad or not supported partition
- This error occurs when iODD can not read the internal HDD.
- Please change the HDD or USB cable.
"Too Many Files" - too many files in a folder
- iODD allows max 32 files or sub folders in a folder. (under "_ISO" folder)
- Split a folder into subfolders.
"NO _ISO Folder" - there is no folder named "_ISO".
- create a folder named "_ISO" at root folder.
"NO - DISC" - there is no files in "_ISO" folder
- there is not a file or sub folder in _ISO folder.
"Disc Locked" - Disc is locked
- The OS or a application has locked the ODD drive at any reasons.
"DEFRAG" - defrag
- ISO file can have max 24 fragment in physical sector address. VHD and RMD must have no fragment.
- To solve this situation, please do Disk Defragmenter for Disk Defragmentation.
"vDISK Limit" - the number of virtual drives is more than limit
- The max number of Virtual disk drives is 4.
- You can not select more than 4 Virtual drives.
"Already Hit" - already selected
- You can not select the file that have been selected already.
"No Use Dynamic" - not supported dynamic VHD
- The VHD file selected is Dynamic VHD file. fixed VHD is only supported.
"No Use Sparse" - not supported sparse file
- The sparse image file is not supported as Virtual Drive.
"Enc Ver Err ???" - Encription Version Mismatch
- HDD Encryption version is 60s, Whereas firmware version is 70s.
FAQ
iODD will not boot.
- Refer to Booting Error
The touch sensitivity is poor.
- Now this problem is cleared.
- if you have old one, please put thin paper or vinyl between the HDD and this product. (not cover)
I have forgot my password. can i reset the password? i don't care my data will be lost.
Refer to Initialize All
I have forgot my password. can i find out my PIN? or can i restore my data?
No, It is absolutely impossible in spite of developer.
The LCD displays "IODD 2541" only.
- Update the latest firmware.
If mount Virtual Drive (VHD, RMD, IMA) then the main mode will be changed automatically to CD-MODE, and If i change to DUAL-MODE then the disk is write protected.
- You can change this by changing file name. refer to VHD Tool++
Can i unmount the Virtual drives (VHD, RMD, IMA) that mounted?
- Try one of the following steps.
- push button '7' for 3 seconds. ( Firmware 69+ or 79+)
- Menu->Advanced->Umount VHDD
The Firmware update has failed repeatedly.
Please refer to How to update
Firmware
- There are 2 sorts of iODD's Firmware.
- FAT version - supports Fat32 and exFAT partition.
- NTFS version - supports NTFS partition.
- There are 2 types of encryption version. one is 6x . the other is 7x.
- 7x is more secure than 6x against brute force hacking.
- 6x and 7x are not compatible to each other.
- you must backup your data before update encrypted iODD with other firmware.
How to update
- Requirements : PC ( Windows OS, USB Port)
- Warning - You must connect only one iODD device.
- Please update the exact firmware matching the first partition of iODD.
- If you update wrong firmware, retry the updater with correct firmware.
- Download the below firmware file.
- Uncompress the zip file to proper folder.(Do not run it within zip file)
- Run the EXE file.
- If "Device is Detected" message appears, then press "Update" button.
- If not, follow the next steps
- Use another PC.
- Change the USB cable.
- (for 2541.) Press the Reset button and hold, and connect the iODD. and hold the button for 1 second. and run the firmware updater.(this reset button is on the main PCB inside iODD.)
- (for 2531.) Press the Reset button and hold, and connect the iODD. and hold the button until USB detection (for about 5 seconds). and run the firmware updater.(this reset button is on the main PCB inside iODD.)
- If it is successful, then press "Exit" button. and reconnect iODD.
Latest
- 2016. 3. 28 - 69(79)-05 - NTFS version 6x, NTFS version 7x, FAT32/exFAT version 6x, FAT32/exFAT version 7x
- Fix minor bug.
Archives
- 2016. 3. 26 - 69(79)-04 - NTFS version 6x, NTFS version 7x, FAT32/exFAT version 6x, FAT32/exFAT version 7x
- VHD, RMD are now supported with Rufus.
- Button '6' => Select VHD(or RMD, IMA) and the state is saved instantly.
- 2016. 3. 7 - 69(79)-03 - NTFS version 6x, NTFS version 7x, FAT32/exFAT version 6x, FAT32/exFAT version 7x
- Booting ability is same as iodd-2531.
